
Accessing the Patient Scheduler
To access the patient's schedule, follow these steps:
- Hover over the Motivity icon located in the top left corner of the screen.
- Click on the Scheduler-Patient menu.
- You will land on the scheduler page.
- Select the service location.
Select the patient to view their calendar.

After selecting the menu, you land on the scheduler page. Select the service location and then the patient to view the patient's calendar.
Adding or Editing General Availability
While viewing the patient's calendar on the scheduler page, you can manage their general availability:
- Click the 3-dot (ellipsis) icon on the top right side of the patient scheduler view.
- Then, click General Availability.
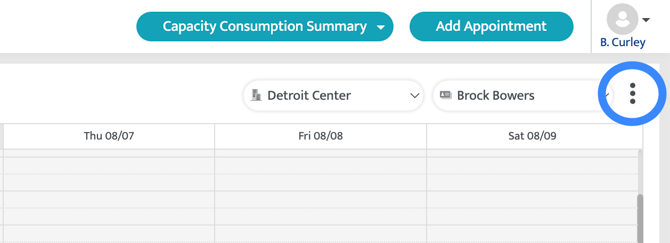
- To add new availability, click anywhere in the week-view calendar.
- A multi-select Place of Service (POS) field will appear.
- Choose one or more applicable POS types for that slot.
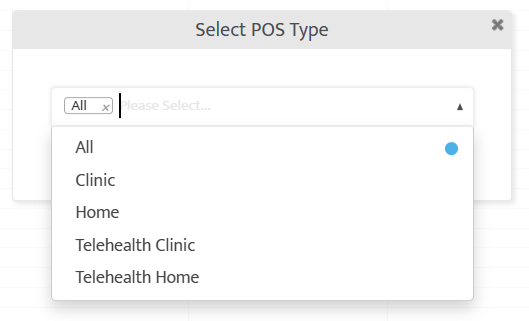
- You can set recurring availability or modify existing availability by clicking and dragging.
- If the slot is recurring, configure the recurrence — your POS selection will apply to all recurring slots.
- Click Save in the popup to confirm your changes.
- You’ll now see POS tags displayed inline on each availability slot, and in a tooltip when hovering in the Scheduler.
Tip: For patients with varied availability (e.g., clinic on weekdays, telehealth on weekends), you can assign different POS types to different timeslots to give your schedulers the full picture at a glance.
Last Updated: 5/22/2026 by Tatum Winslow