Count Instrument
The Count is simply a tally of the number of occurrences of the target behavior/skill. This instrument can be synonymous with "frequency" or "rate". The data collection interface looks like this:
-png.png?width=688&height=355&name=mceclip1%20(20)-png.png)
You can click on the up or down arrows to increase or decrease the number in the box. Or you can simply tap in the box to type in a number manually.
This article will show you how to use Count to track
- Count and Rate
- Count for the Day (No Rate)
- Combine Count and Duration to create shorter observation periods
Count and Rate
Count Instrument is used to measure the number of times a behavior/response occurs contained in an observation period. For example the number of peer initiations, the number of times a student throws items or the number of requests or mands. However, if the measures of count were obtained in variable observations periods of 15 minutes, 1 hour, or 2 hours, respectively, a much different interpretation of the numbers will be displayed. Therefore, the observation period, or "Opportunity period" in Motivity is very important to consider.
When you combine count and the observation period it yields the most widely used measure in behavior recording, rate (of frequency) of responding. Rate is a ratio consisting of the number of responses (count) and time (opportunity period). Using rate makes the measurement more meaningful. For example, knowing that Alice wrote 150 words in 15 minutes, and JoJo's self-injurious behavior occurred 12 times in 1 hour provides important information and context.
When you use the count instrument for a target, the default setting is to graph rate per day.
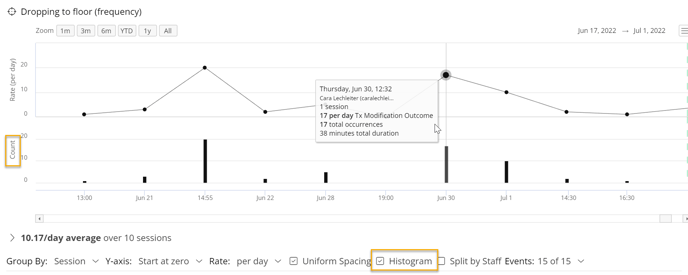
For example: If we are tracking dropping to the floor. We will see the line graph display rate per day. You can see information about each session by hovering your cursor over the data point.

You can also view the total count for the length of the session in a bar graph under the line graph. To turn this feature on, check the box labeled "histogram" under the graph. Uncheck the box to turn it off.

Below the graph, you can scroll down to see the session length (the default opportunity period). For example, on Jun 28, the session was 1 hr. and 45 min (1.75 hours), the behavior occurred 5 times in that observation period. The rate is calculated by dividing 5 by 1.75 for the rate of 2.9.

Count for the Day (No Rate)
You may want your graph to simply display the total count for the day rather than the rate per hour. To do this, click on the "Rate" option below the graph and select "Count" from the dropdown menu. You can also use this same menu to change the graph to display by rate per hour, per 30 min, per 15 min, or per min.

Combine Count with Duration to create shorter observation periods
Sometimes you want to track the frequency of behavior for a sample amount of time. This is common for high-frequency behaviors. For example, you want to measure the number of self-stimulatory behaviors within a 10 minute period and have the graph display an accurate rate per hour you can combine Count with the Duration Instrument to capture this data.
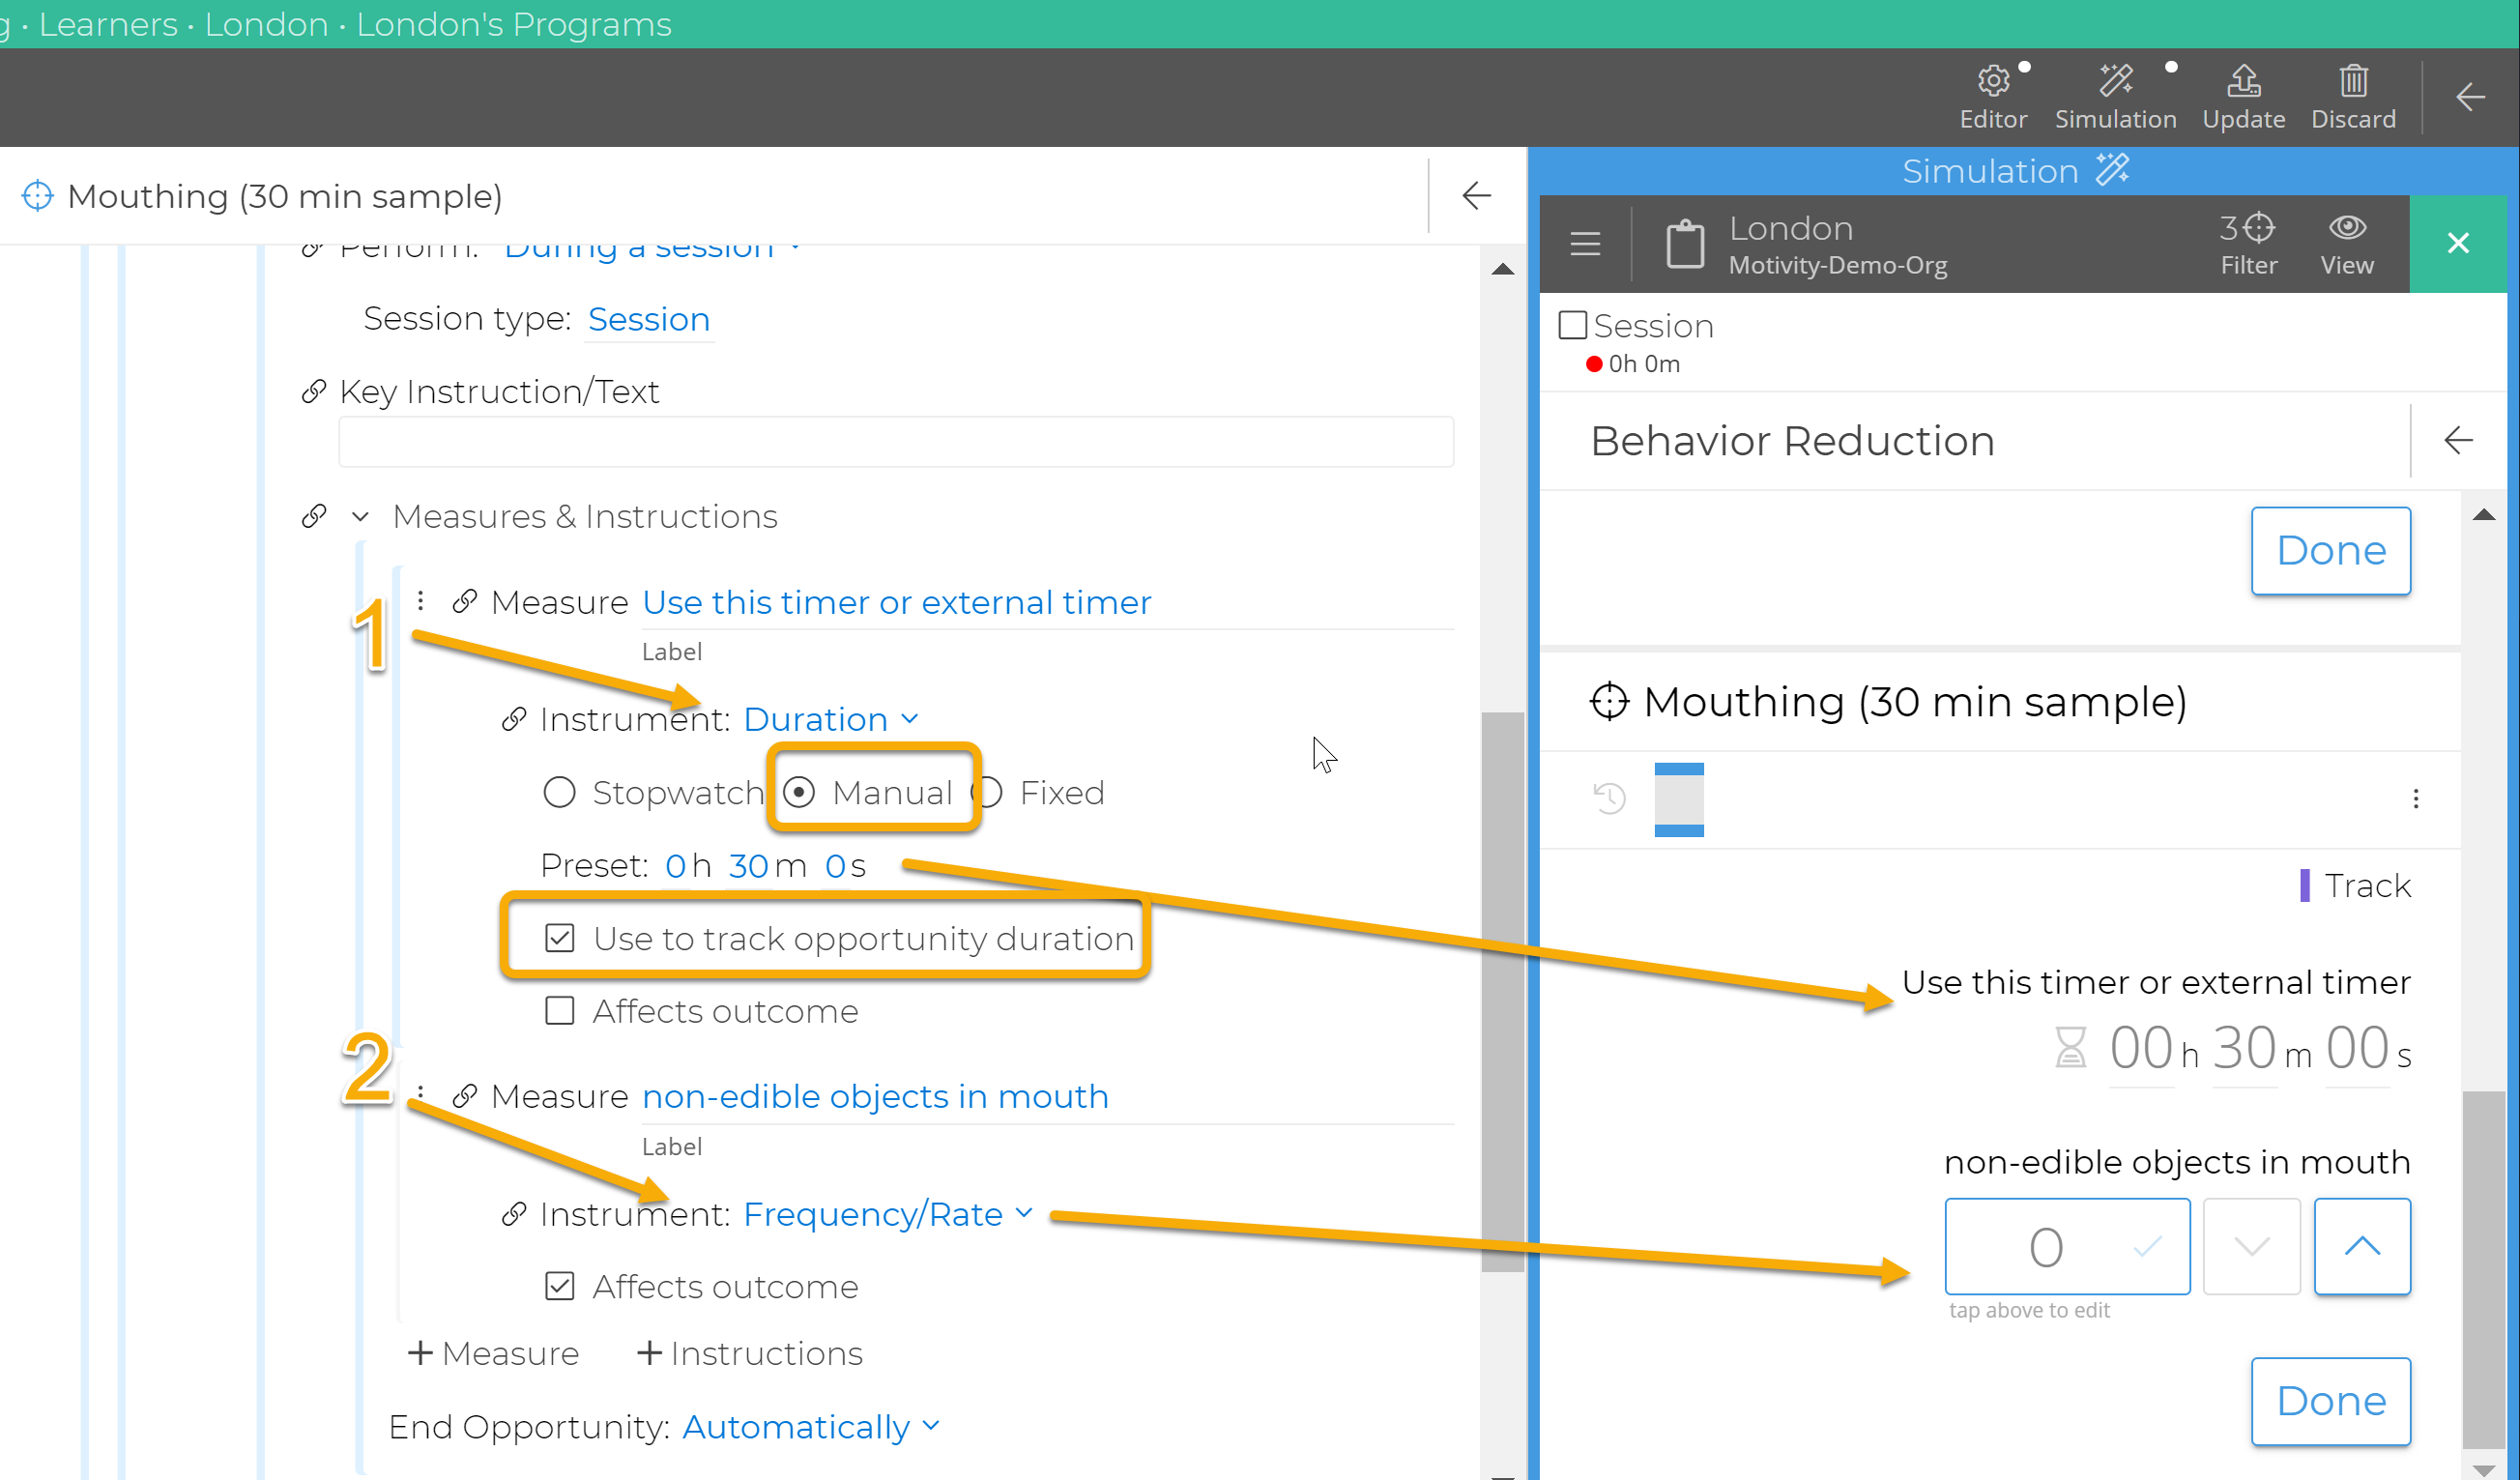
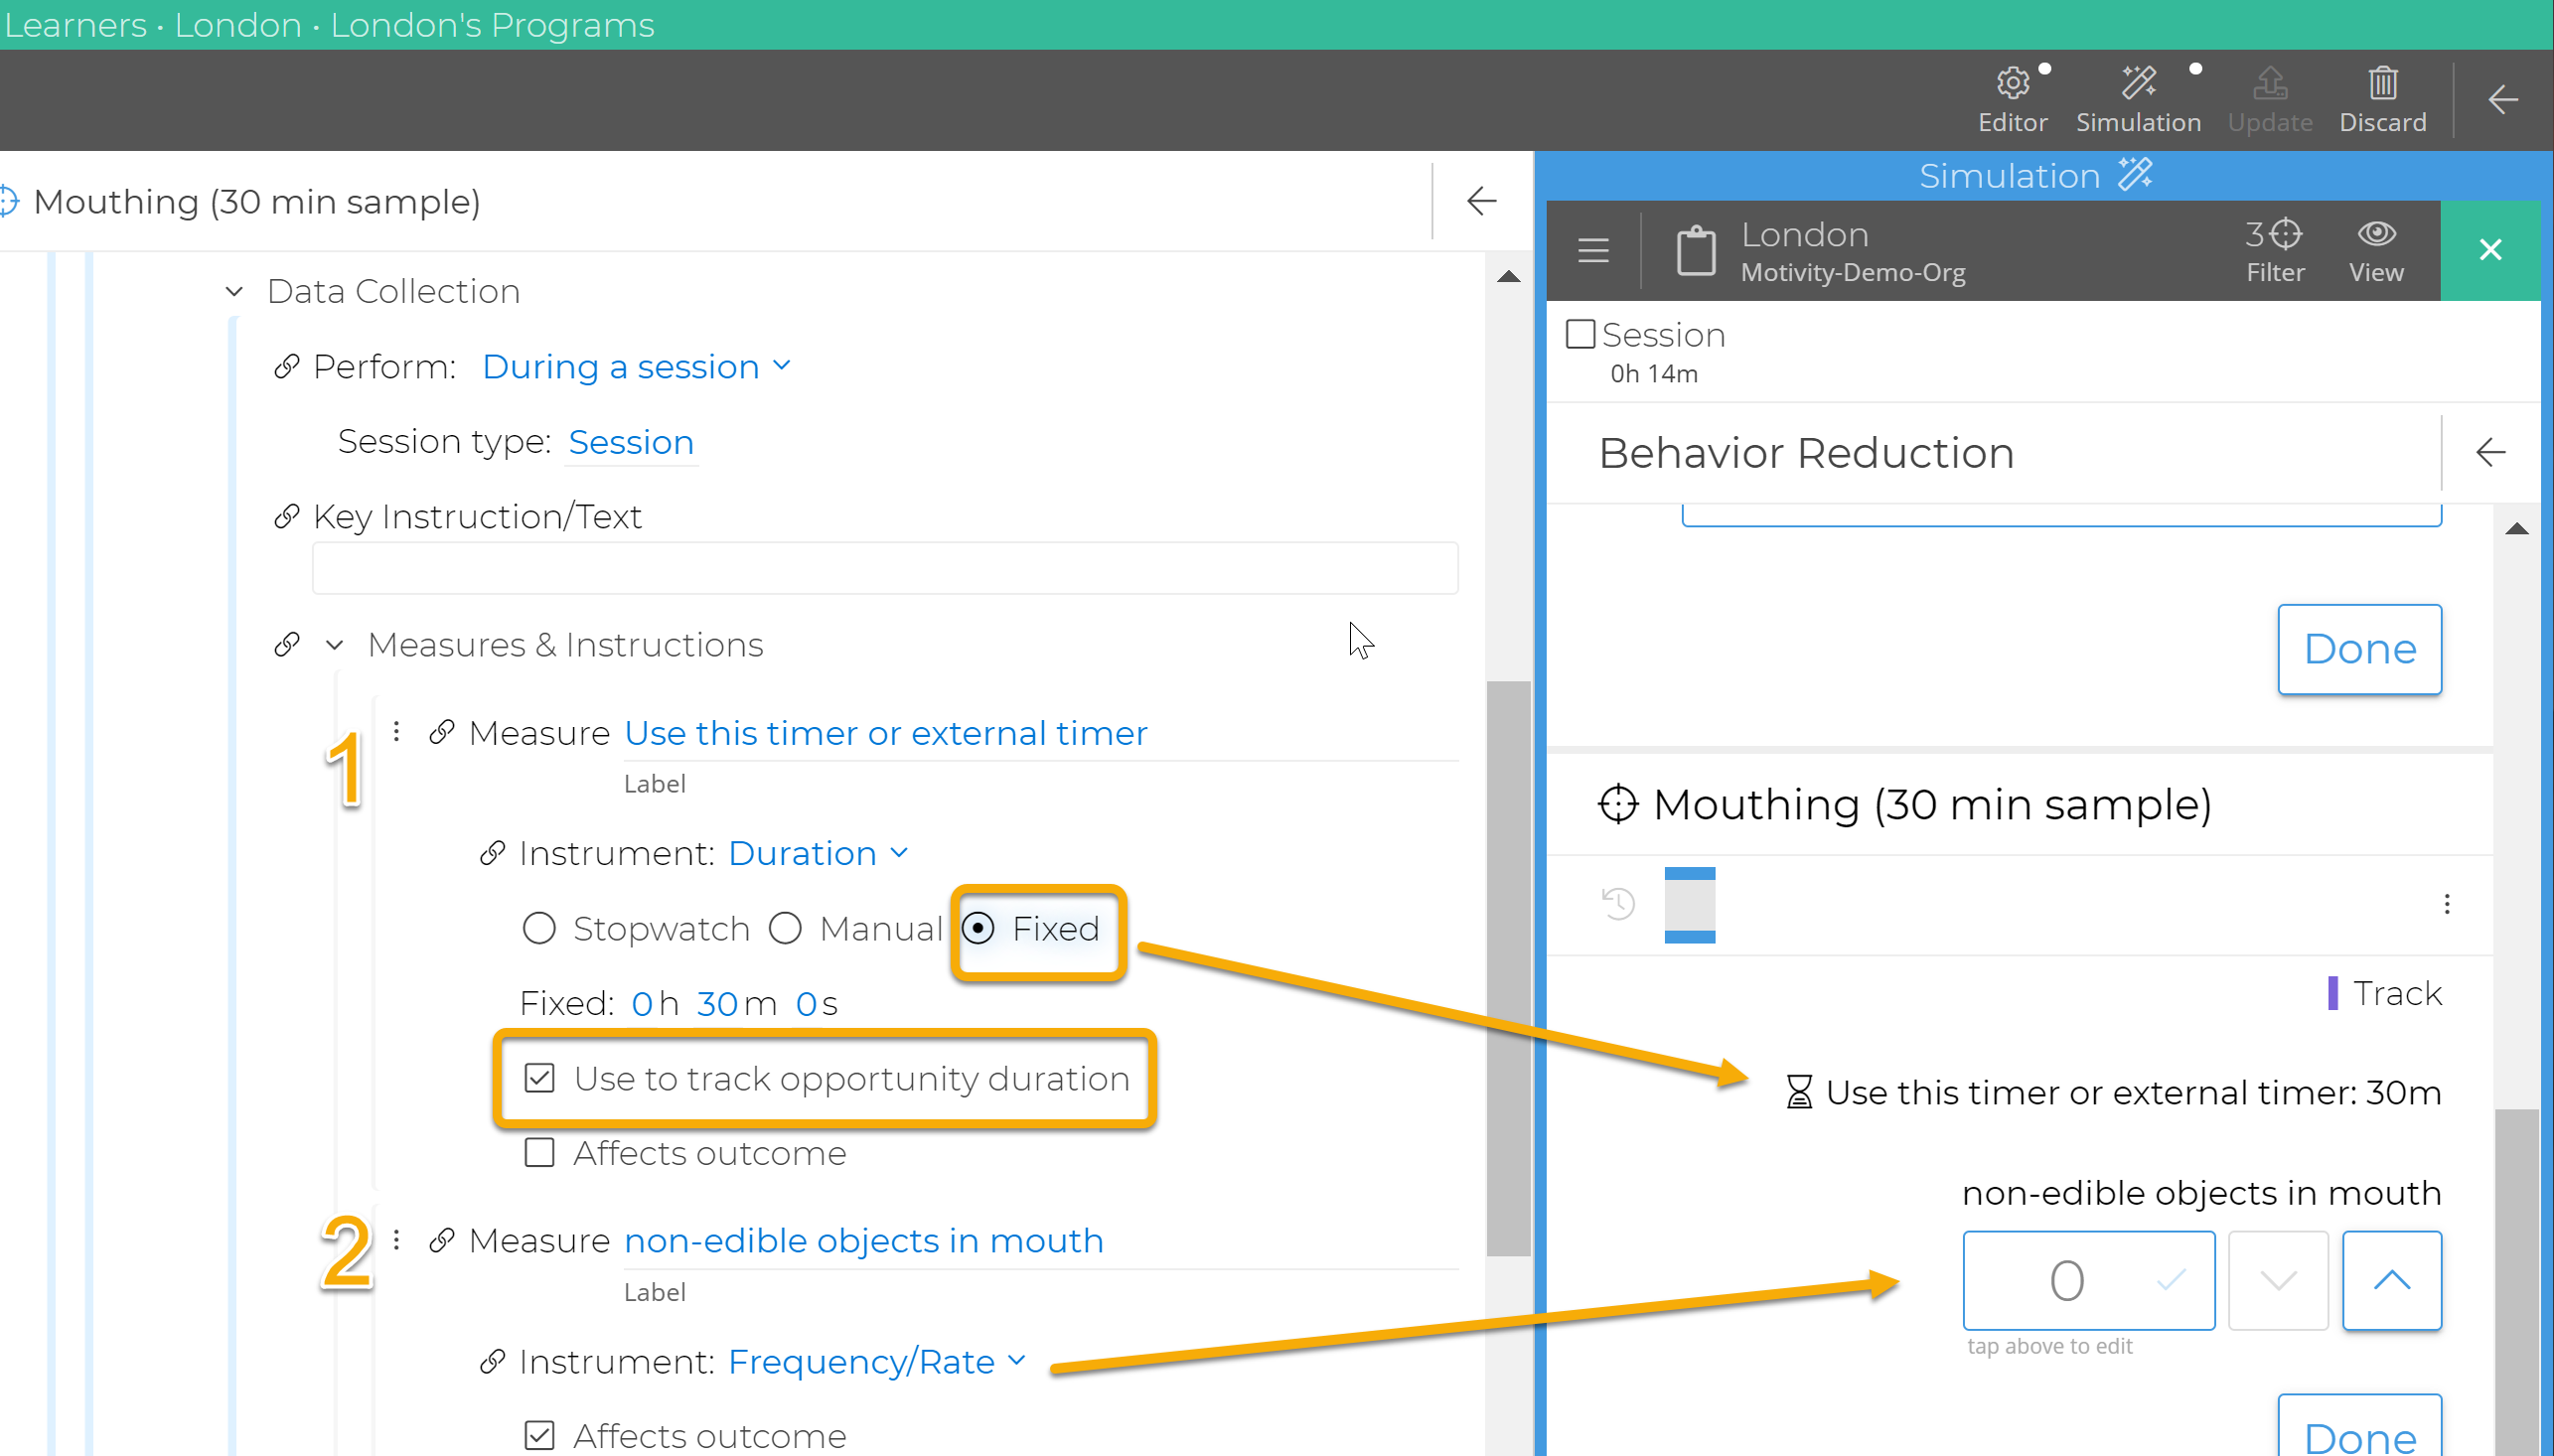
The Duration instrument can also be used in combination with Count to set an ad hoc, preset or fixed data collection interval from which the frequency/rate is calculated. This is used when you don't necessarily want the frequency/rate of behaviors calculated by the entire session duration. If you want your data collectors to use a preset interval, then enter the time interval you want them to use. If you don't want the interval to change or be edited in data collection mode, use Fixed.
Example: if you want to track a high-frequency behavior (Mouthing) for a smaller subset of the session, you can preset a timeframe that you want it tracked for. Then data collectors only track that behavior during that interval and the rate is scored by the time of that interval.


When the "Use to track opportunity duration" is checked, then the instrument value (duration) will be used as the denominator when calculating the rates of any frequency data collected during that opportunity (interval of time). When this box is checked, the icon next to the timer changes from a stopwatch to an hourglass.
Last updated: 7/15/2022