This article reviews how to create and save a Session Note for a learner after a session.
Once you have a Session Note Template, staff can use it to complete Session Notes for learners. The session notes will be saved in the learner's Timeline & Reports section.
You can create a session note in two different ways.
1. Click on Timeline and Reports and then click +Note in the right-hand corner.
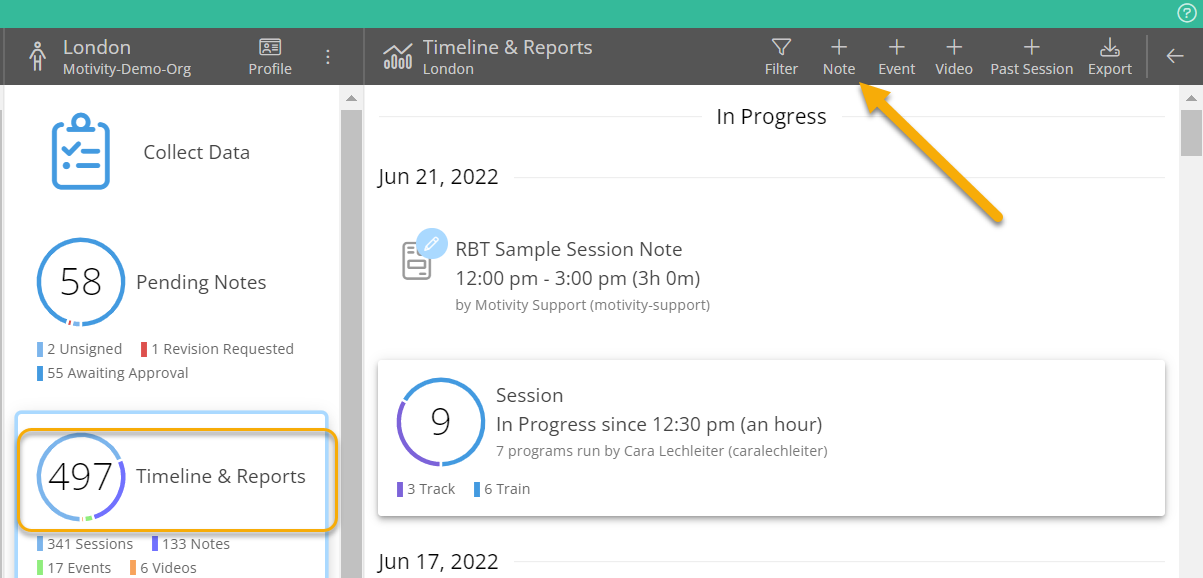
2. While in a session, click the +Note button in the right-hand corner.

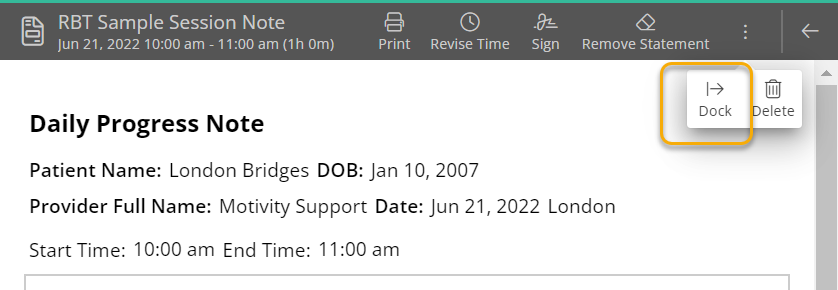
You can start creating a session note at any time during a session, or after the session is complete. If you would like the option to collapse or expand your note, select the Dock button.
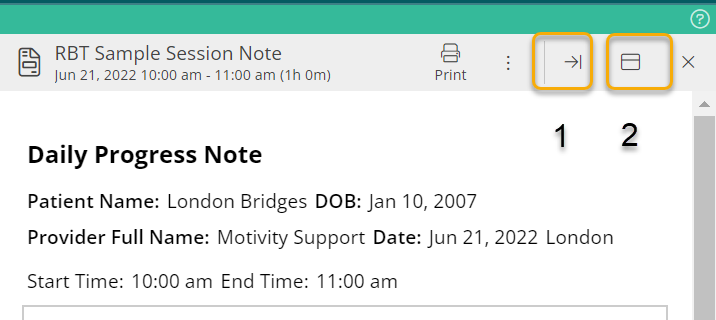
When selected, the Dock button will provide several options. The arrow pointing towards a vertical line (1) will collapse the session note completely. You can undo this by selecting the arrow button again. The window button (2) will expand the session note to take up the entire screen. Collapse the note back to a half screen by selecting the window button again.
Steps to Complete a Session Note
1) Select Template: After you have clicked +Note, you will be shown a list of notes your role is authorized to create. For example, if you have a BT role, you might only see notes with the BT or RBT label. Labels are a way for an organization to sort types of notes.

2) Enter Date and Time of Shift: After selecting a template, enter the correct billable date and time (shift) that is being billed. The date and time can be edited later if needed. The session time is not autogenerated from the session since there can be multiple shifts within a data collection session. 
Click on +Note. This will display the Session Note that needs to be filled out by staff. Some sections will be auto-generated from session data. Imported data will automatically display based on the shift start and end time.
3) Fill in Session Note Template: Each session note template is unique based on what your leadership team created. Fill in all required fields and narrative sections. Double-check billable date and time since the session data will display based on this period.
4) Sign the Note: To finalize the session note, you need to sign the note. The signature will create a timestamp of when it was signed at the bottom of the Session Note. Once it's signed, it can't be edited unless you unsign the note. If you unsign a note, you will need to sign it again to finalize the revised version. The new date and time will appear on the new signature timestamp.
-png.png?width=1412&height=1096&name=mceclip2%20(3)-png.png)
-png.png?width=1412&height=1657&name=mceclip4%20(3)-png.png)
Collecting Parent/Caregiver Signatures
If your organization has created a note that requires a parent/caregiver signature, you will notice a purple banner at the top of your screen. Tap the banner. This will display an area in which the parent or caregiver can type in their name.
A parent/caregiver signature can be collected at any time. Their signature will not lock the note. The note is only locked after the note's author signs. You can also collect the parent/caregiver signature after a note is locked.
