You have the option through Motivity's note template builder to mark your notes with geolocation. If you would like to access this feature, you will need to adjust your note templates before seeing a note author's location on a note.
To add a geolocation requirement to a note template:
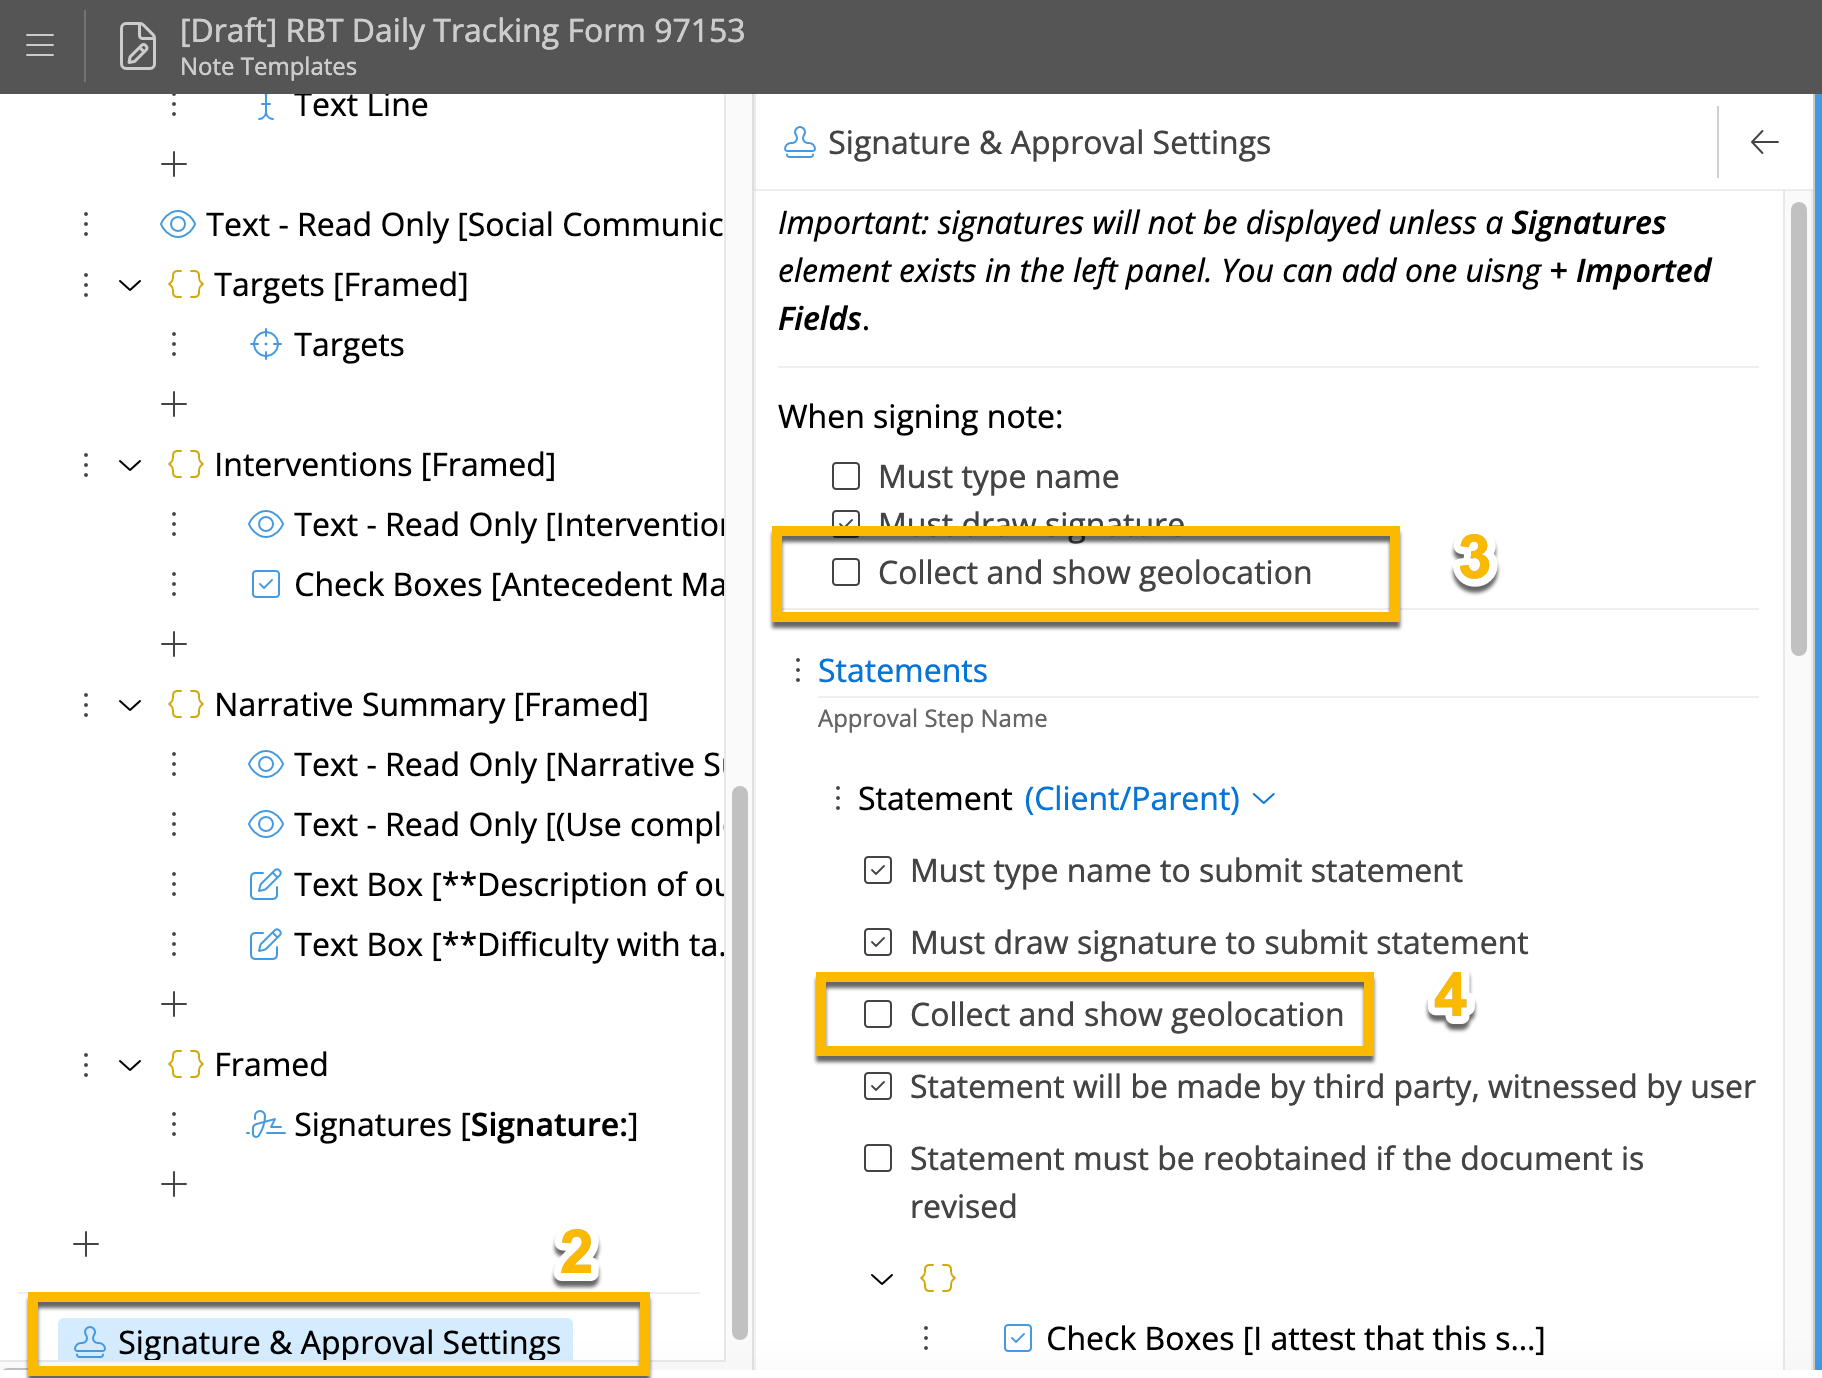
1. Navigate to "Settings" --> "Note Templates" --> Click on the template you want to change and click "View/Edit"
2. Scroll to the very bottom of the note tree (left side) and click on "Signature and Approval Settings"
3. At the top of the middle column, you'll see options for the note author's signature. To turn on geolocation, check the appropriate box
4. Optional If you want geolocation on parent signatures or other types of statements or approvals, select the box for geolocation in the statement/approval settings further down in the middle column.
5. Click "Update"
Once you click "update" the new note template will be in effect for new notes created.
Signing a note with geolocation:
You must turn on your location settings on your device and allow Motivity to access your location for geolocation to work on notes. Please note that you will be unable to sign a note if these permissions are not granted.
Below are instructions on how to turn on location services for common browsers:
**Motivity Note**: Currently, the Apple app for Motivity will not allow you to turn on location services; therefore, you cannot sign notes that require geolocation through the Apple app at this time. Please use a browser if your notes needs geolocation.
1. When you sign a note for the first time, your browser will likely ask for permission - choose "allow".
2. Sign the note as you normally would
3. On the signature you will see the GPS coordinates for the signer. You can click on these to open a small map that will show the note author's location at the time of signing.

Created: 8/15/23