This article describes how to configure the Session Outcome in the Mastery section of a target phase in the Program Builder. For an introduction, please read the Configuring Mastery (Overview) article first.

This article has three parts:
What is a Session Outcome?
Whenever data is collected for a target, it yields a "Session Outcome" which will be graphed in the target performance chart. The Session Outcome has two main aspects: a quantitative Score (e.g. "60% success ratio", "25 points", "37 minutes", or "17 occurrences") and a qualitative designation ("Succeeded", "Failed", or "Indeterminate"). For example, the Session Outcome for a discrete trials target is the success ratio of the opportunities that were performed during the session:
Multiple Phases in a Session
If a target is exercised in multiple phases during a session (e.g. "Probe" and "Teach"), it will yield a separate Session Outcome for each phase.
The Session Outcome Score is what's graphed on the Y-axis of the target history chart. The dots are color-coded based on the qualitative designation (Failure = red, Success = green, Indeterminate = black/gray).
Charting Behaviors
For behavior tracking targets, the Session Outcome Score is the total count of occurrences, but the Y-axis is displayed as a Rate (count / duration).
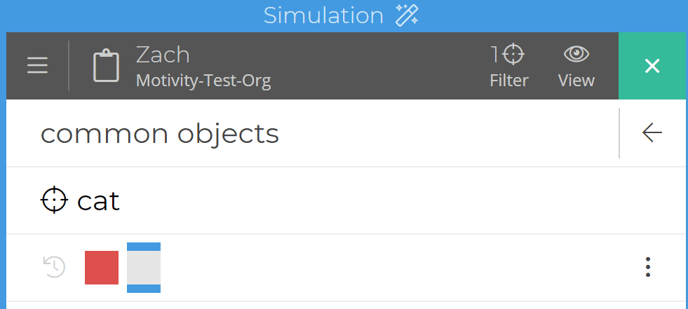
During data collection, the current Session Outcome Score is displayed under the opportunity indicator bar, and the background of the bar becomes shaded red ("Failed") or green ("Succeeded") to indicate the qualitative designation that would be yielded if the session were to end now.
Session Outcomes are important because they affect phase transitions and mastery. For example, a target might be configured to transition from Train to Maintain when the Session Outcome is a "Success" for three consecutive sessions. See [Transitions] for more detail.
Session Score Calculation
The Session Score Calculation control lets you specify what method should be used to compute the quantitative outcome score of the session. For example, a discrete trial target should yield the percent correct of opportunities performed during the session, a behavior tracking target should yield the total number of occurrences, and a quiz worksheet or a PEAK target should yield the numeric performance score as the session score. The control has three choices: Automatic, Opportunity Success Rate, and Opportunity Score Aggregate:

Automatic
The default choice is Automatic, which lets the system decide what score calculation to use. In this mode, the method will always be "Opportunity Success Rate" unless the target consists entirely of Count instruments, in which case the method will be "Opportunity Score Aggregate - Sum". Therefore, Automatic is likely to be an appropriate choice for discrete trials and behavior targets, but you should change it if you want opportunity scores to be reflected in the session outcome score (e.g. for a PEAK target).
Tip: Simulating Data Collection
If you are unsure how the score will be calculated, you can experiment by simulating data collection with the green clipboard button in the simulation panel that appears to the right or below the configuration panel, then start a simulated session, collect some data, and look for the Session Outcome score under the opportunity outcome indicator bar.
-png.png?width=688&height=279&name=mceclip0%20(2)-png.png)
Opportunity Success Rate

Use this choice if you want the session outcome score to always be calculated as the ratio of successful opportunities over the total number of opportunities. Usually this will behave the same as Automatic, but sometimes you will need to change it, e.g. if you are using the Count measure to track performance on an activity that has a success threshold, and you want to graph the percent of opportunities that exceeded the threshold rather than the sum of the counts.
Opportunity Score Aggregate.

The Opportunity Score Aggregate lets you specify that the session outcome score should be the sum, average, minimum, or maximum of the opportunity scores. If there is only one opportunity performed per session for this target (e.g. a single PEAK score) then all these sub-choices would yield an identical value (the score of the opportunity). Otherwise, the chosen aggregate method would be used. E.g. if there are three opportunities with scores (15, 50, 10) then the session outcome would be 25 (Average), 75 (Sum), 10 (Minimum), or 50 (Maximum).
Session Success Criteria
The Session Success Criteria subsection in the Program Builder lets you tell the system how to determine whether a Session Outcome should be designated as a success, failure, or indeterminate.

None:

This is the default setting. Session Outcomes will be Indeterminate, regardless of performance. This is appropriate for behavior tracking targets or any time you are collecting data without regard to success or failure.
Basic:

Basic mode allows you to specify that the Session Outcome will be a Success if the opportunity success ratio exceeds a specific percentage over a minimum number of trials. You can use the checkbox to indicate that the first trial must also be correct (i.e. if the checkbox is selected then the Session Outcome will be a failure if the first trial does not succeed, regardless of the performance on subsequent trials).
When does Session Outcome get determined?
If Basic mode is used, the Session Outcome will be designated as Success or Failure as soon as enough data has been collected to determine if a target would succeed or fail if the minimum number of trials would be performed. For example, if the criteria is "80% out of at least 5 trials", if the first 4 trials succeeded, the session will be designated as a Success before performing the 5th trial, because it would still achieve 80% if the 5th trial failed. Conversely, as soon as 2 trials fail, the session would be designated a Failure because it would not be possible to reach 80% in 5 trials. If more than the minimum number of trials are performed, the designation could change.
Advanced:

Advanced mode is a powerful option that allows you to define rules that specify custom handling of Session Outcome designation when basic mode is insufficient. You can skip this section if Basic mode meets your needs, or if your system has been configured with [global parameters] to handle Session Outcomes.
In Advanced mode, you can create as many rules as you want. Although rules can be complex, they are designed to be read like English sentences, making them easier to understand. The system examines each rule until it finds one that matches the current situation, and then applies the designation associated with that rule.
The first part of each rule specifies the Session Outcome designation (succeeds, fails, indeterminate) that would be applied if the conditions in the rest of the rule are met:

The second part of the rule ("when performing...") specifies the number of opportunities that must be performed as precondition for the rule to be applicable. For example, you can say that the rule is only applicable if EXACTLY a specific number of opportunities are performed; it will not apply when there are less than or more than that number of opportunities.

Limiting the number of Opportunities
Expert tip: if all your rules specify "exactly X" or "at most X", and none of your rules mention "at least X", then the user will not be allowed to create more than X opportunities during data collection. If you have a rule that mentions "at least X", then the user will be able to perform as many opportunities as they want.
The third part of the rule specifies the range of the opportunities that are to be considered when applying the rule condition. You can specify "all", "all but N", "any N", or "at least N%":

The fourth part of the rule, accessed by clicking on the word "opportunities", lets you specify that the rule should only consider the results of the first N or last N opportunities.

For example, you can specify that the session succeeds if all of the first 2 opportunities succeed:
The last part of the rule lets you change the condition for the rule trigger from "succeed" to "fail" or "indeterminate":

You can combine these rule configuration options to create very flexible and powerful rules. For example, the session should fail if any 2 of the first 5 opportunities fail:

You an create as many rules as you want. Use the +Rule control to add a rule:

The order of rules matters. The rule processor looks at each rule sequentially; the first rule it finds whose conditions are met will fire, and then the processor will stop. Consider a session that starts with a failed opportunity, followed by 4 successful opportunities ( - + + + + ). If the rules are listed in the order shown above, the session would be designated a failure, because the rule "fail if first 1 fails" would fire. But if the 2nd rule ("succeed if 80% of 5 succeed") was moved ahead of it, then that rule would fire, and the session "- + + + +" would be designated a success. Pay attention to the order of your rules!
To re-order, delete, or clone a rule, click the 3-dot menu next to that rule:

Lastly, there is always a fall-through rule, which by default sets the outcome to "indeterminate":

If you set the fall-through rule to "fails", then the session will fail as soon as the first opportunity is recorded (unless it matches one of the rules above it). If that's not desired, then you should leave the fall-through rule to "indeterminate" and create an explicit fail rule, as in the 4-rule example above.